First, you may want to check if your ISP is blocking outgoing SMTP port by use DOS/Unix command:
c:\> telnet relay.dnsexit.com 25
If the port is open, you should see some messages like
Connected to relay.dnsexit.com (64.182.102.185).
Escape character is '^]'.
220 box7.dnsexit.com ESMTP Sendmail 8.13.8/8.13.8; Sun, 25 Mar 2007 22:31:30
-0400
If there is no response at port 25, you ISP must have blocked the port. To go around port 25 blocking that is common practice by a lot of ISPs, we have other ports open for your mail relay. You can try port 26, 940, 8001, 2525, 80 by using the same telnet command by telnet to the alternative port instead of 25. If the connection gets responses from the alternative SMTP port, you should use that port instead of 25 when setting up Smart Hosting. Here are the settings using in Exchange 2007
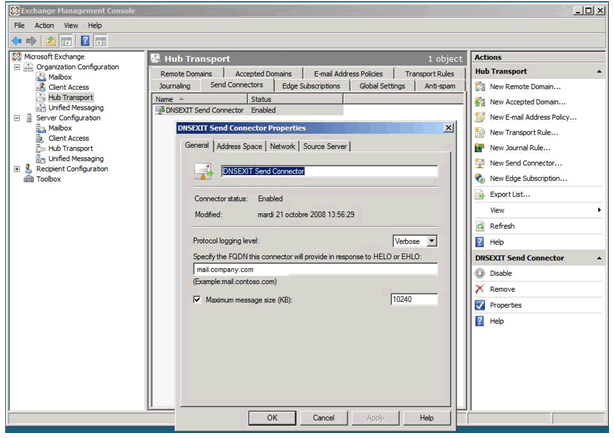
Open Exchange 2007 Management console
Creating the SMTP Connector :
Deploy Organization Configuration....
On the left pane click on "Hub Transport"
Select the "Send Connectors" tab
On the right pane click on "New SMTP Send Connector"
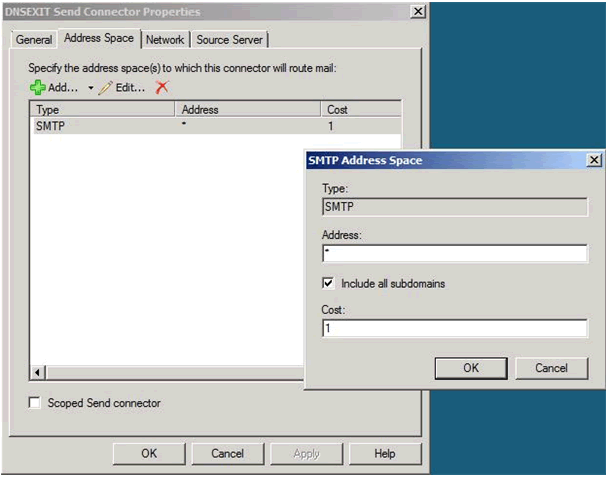
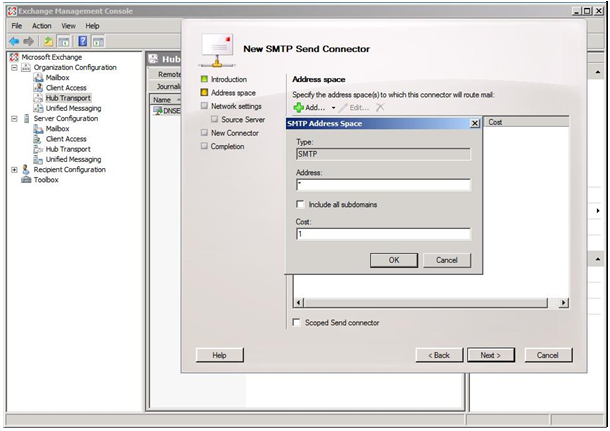
In the address space screen press "Add" and type the caracter star in the "Address" field.
Leave 1 in the "Cost" field to make it as primary and press "OK"
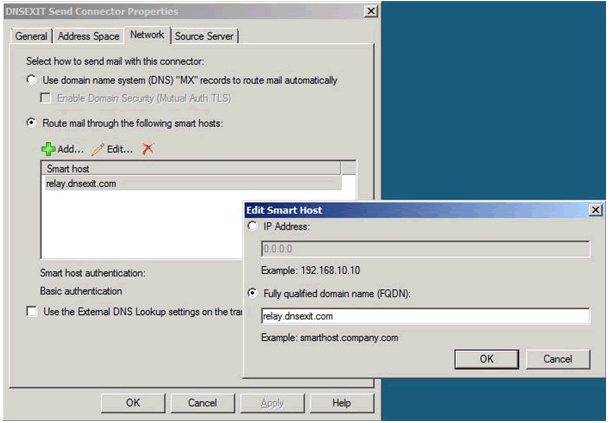
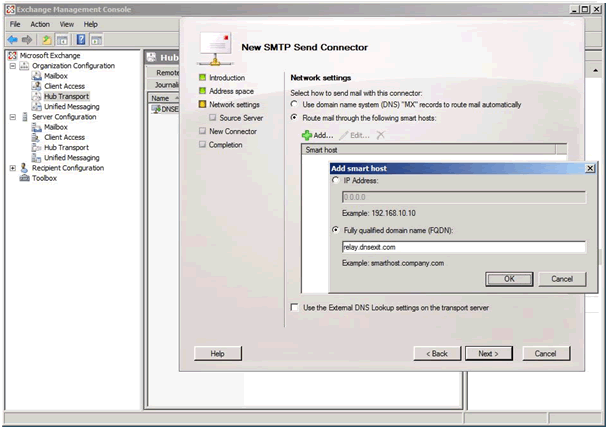
In the "Network settings screen check" "Route mail trough the following smart hosts:" press "Add".
Select "Fully qualified domain name", type the address of the dns exit smtp relay (relay.dnsexit.com), press "Ok"
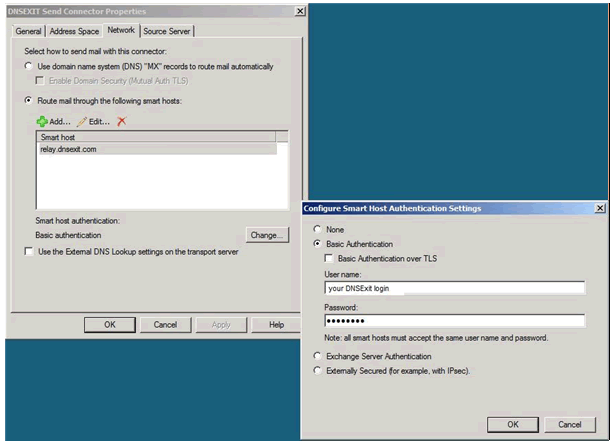
Check the option "Use the External DNS Lookup settings on the transport server" then press "Next".
In the "Source Server" screen press "Add" and add the server where your Exchange is installed press "Next" then press "New".
The SMTP Connector is created, try to send an email, it should be ok. If not restart your server or your "Microsoft Exchange Transport" service.
One time the configuration is done, you can verify your installation with the following captures.