First, you may want to check if your ISP is blocking outgoing SMTP port by use DOS/Unix command:
c:\> telnet relay.dnsexit.com 25
If the port is open, you should see some messages like
Connected to relay.dnsexit.com (64.182.102.185).
Escape character is '^]'.
220 box7.dnsexit.com ESMTP Sendmail 8.13.8/8.13.8; Sun, 25 Mar 2007 22:31:30
-0400
If there is no response at port 25, you ISP must have blocked the port. To
go around port 25 blocking that is common practice by a lot of
ISPs, we have other ports open for your mail relay. You can try port 26,
940, 8001, 2525, 80 by using the same telnet command by telnet to
the alternative port instead of 25. If the connection gets responses from the alternative SMTP port, you should use that port instead of 25 when setting up Smart
Hosting.
Click properties

Click okay
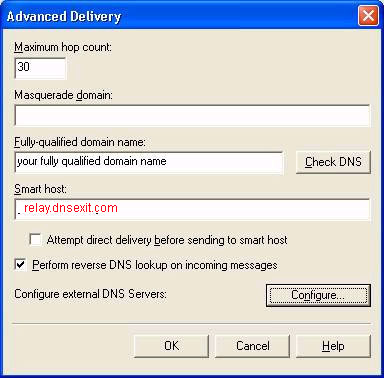
Under Smart Host put in relay.dnsexit.com or the IP as shown.
Click okay
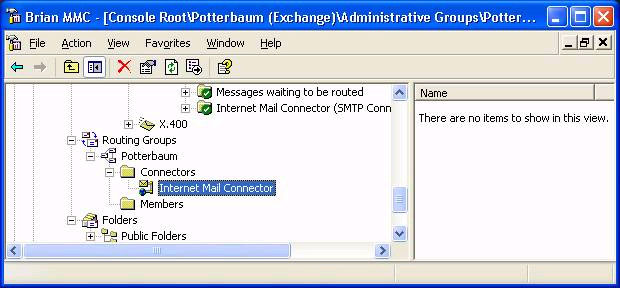
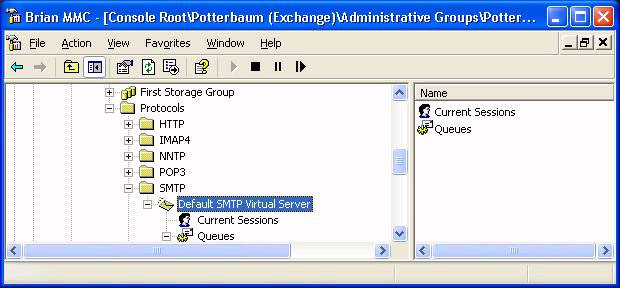
Scroll down to the Routing Groups
On Exchange 2003, what surprises newcomers is that they cannot find the Routing Groups folder in Exchange System Manager. The reason could be that it's hidden. So check by navigating to the top of the interface, then right click Exchange Organization, properties, tick Display Routing Groups. Simply re-open the Exchange System Manager and now you should see the Routing Groups folder.
Expand and right click the Internet Mail Connector
Click on Properties.
Put relay.dnsexit.com or the IP as shown in the “Forward all mail through this connector to the following smart hosts”
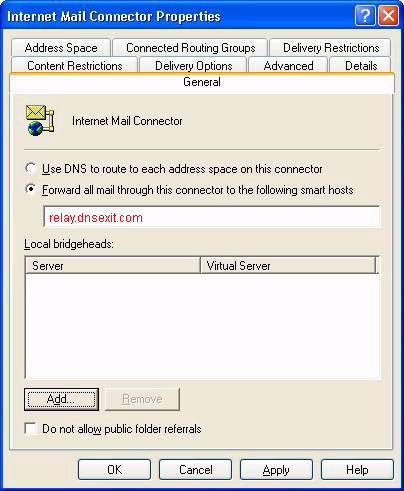
Add your sever to the “Local bridgeheads”
Press okay and restart the server.
Test outbound connections.
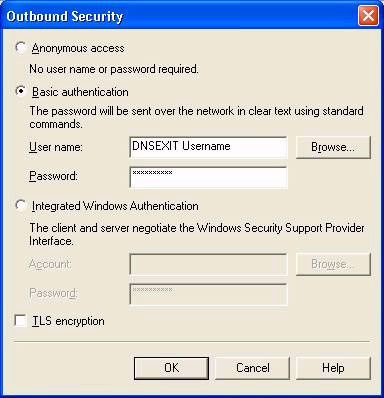
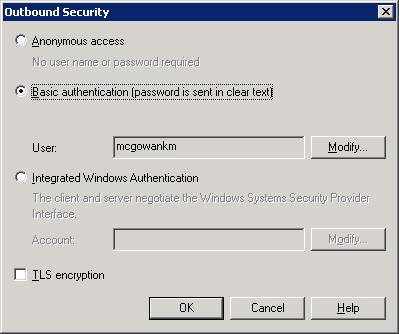
After the above settings, you need to go into the SMTP connector on the Advanced tab, click on Outbound Security and click Basic Authentication, click on modify and put in the DNSExit username/password:
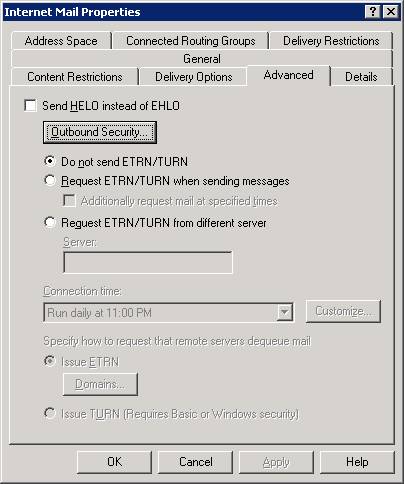
It is highly possible that you will still have problem to send email. You need proceed to change to issue "ETRN/TURN" when sending messages.
1. Open System Manager on the Exchange Server.
2. Under connectors right click on the “Mail Connector” and
select Properties.
3. Select “Advanced” tab.
4. Click on “Outbound Security.”
5. Select “Basic authentication.”
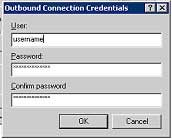
6. Select “Modify.”
7. Under “Modify” enter the username you used to setup the
Mail Relay on DNSExit.com, enter the password that you used in setting
up your Mail Relay on DNSexit.com.
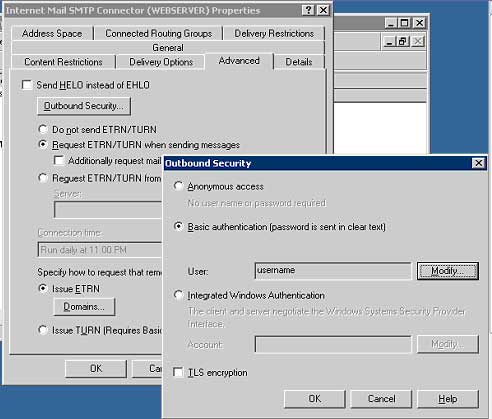
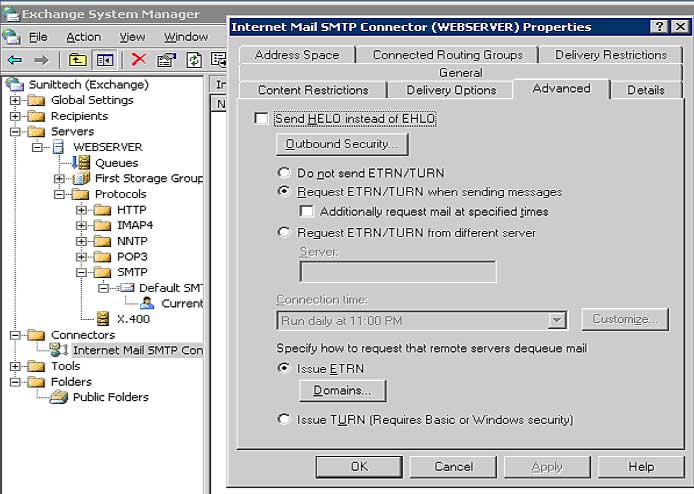
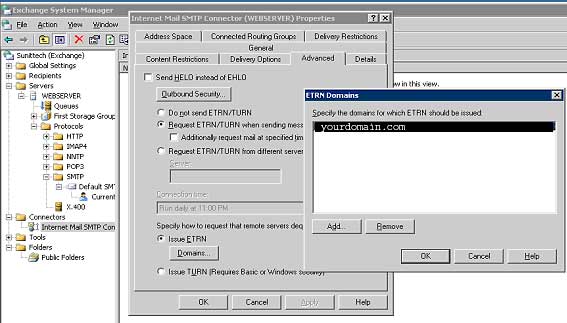
8. On the Advance tab, make sure Request ETRN/TURN when sending messages and Issue ETRN are both selected.
9. Click on Domains and enter your domain name.
After the above settings, the smart host through relay.dnsexit.com should work.